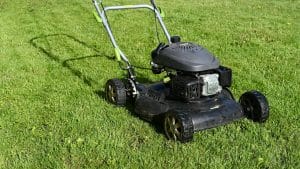
Owning a lush, perfectly mowed lawn can be a bit like having your own little slice of paradise right at your doorstep. Yet, maintaining that piece of heaven can turn into a tedious weekend chore. This is where the wonder of an Automower comes in, promising to keep your lawn in Coleford looking its best without the usual fuss. These robotic helpers make light work of lawn care, allowing you more time to enjoy your outdoor space. They deliver consistent results and ensure your lawn is trimmed quietly and efficiently, embracing the future of gardening tech.
When it comes to setting up an Automower, the process is wonderfully straightforward, even for those who are not technologically inclined. Whether you’re looking to install one in a small garden or a sprawling lawn, these steps make the job easy and time-saving. You won’t need to become a robot expert overnight, as following a few intuitive steps will get your Automower ready to roll, cutting down your lawn woes significantly.
Preparing Your Lawn for Automower Installation
Before you let your Automower loose in the garden, a little prep work can set the stage for smooth sailing. Think of it like getting your home ready for a special guest. Here are some simple steps to ensure your lawn is Automower-ready:
– Clear the Lawn: Start by removing any debris, such as twigs, rocks, or toys. These obstacles might interrupt the mower’s smooth operation and could lead to unnecessary stops and starts.
– Trim the Grass: Ensure your grass is cut to a moderate height before the Automower takes over. A neat base allows the mower to perform more effectively, maintaining a balanced trim across the area.
– Level the Ground: Check for any uneven patches in your lawn. Just like a good dance floor needs to be level, so does the field your mower will navigate. If needed, fill in small holes and even out bumps to promote steady mowing.
These initial steps help in preparing a canvas on which your Automower can work its magic. Think of it like laying the foundation for a house; a well-prepared lawn will yield better results and prevent any potential hiccups once your mower begins its routine.
Setting Up the Boundary and Guide Wires
Once your lawn is prepped, it’s time to set up the boundary and guide wires, crucial for steering your Automower. Boundary wires map out the lawn areas for your mower, ensuring it stays within its intended playground. They act like invisible fences, creating a safe path for uninterrupted mowing.
Here’s how you can go about laying these wires:
1. Map Out the Perimeter: Walk the boundary of the area you want mowed, laying the wire about a foot from edges like flower beds or patios. This helps keep a clean border while ensuring your mower doesn’t venture into unwanted zones.
2. Secure the Wires: Use pegs to anchor the wire to the ground securely. Ensure they are snug enough to remain in place but avoid pulling the wire taut. This flexibility allows the mower to handle tricky spots with grace.
3. Designate Areas with Guide Wires: These act as pathways back to the charging station, ideal if you have multiple zones within the lawn. Guide wires help reduce confusion, making recharging a breeze.
By following these steps, you set a clear course for the mower, reducing interruptions and ensuring efficient coverage. It’s a simple yet effective way to keep the Automower on track, allowing it to perform at its best.
Installing the Charging Station
The next step is establishing a home base for your Automower—the charging station. Choosing the right spot ensures smooth and effective operation. Consider having it close to a plug point and preferably in a shady area to avoid direct sunlight, which can heat the battery.
– Find the Perfect Spot: Choose a level area that has easy access from all directions. This positioning helps the mower dock easily and recharge without hitches.
– Connect Power Supply: Plug the station into an outdoor socket, ensuring the power cord is weatherproof and secure.
– Align for Precision Docking: Ensure the charging station faces the lawn, providing direct access for the mower. This setup helps it dock seamlessly, extending the lifespan of your battery.
Placing your charging station smartly guarantees that your mowing process isn’t stalled by power outages, providing consistent lawn care.
Calibrating and Testing Your Automower
After setting up all the necessary components, it’s important to calibrate your Automower so it can function efficiently. Calibration ensures straight and precise mowing, helping you achieve the perfect lawn finish.
– Initial Calibration: Start by programming the mower to understand your lawn’s layout, setting it to function on a schedule that suits your grass’s needs.
– Testing the Setup: Run a few trial rounds, observing how the mower navigates and addresses obstructions.
– Adjust Settings: If the mower struggles with certain areas, tweak the height or boundary settings to enhance performance.
Testing is a great way to identify and address potential issues, guaranteeing a professional cut every time.
Your Perfectly Maintained Lawn Awaits
With everything in place, you’ll soon enjoy the benefits of a consistently groomed lawn in Coleford. Regular checks and maintenance help maintain your mower’s efficiency, ensuring it delivers a neat and tidy finish throughout the seasons. It’s like having a reliable friend who’s always there to lend a hand with your garden. Enjoy the ease and simplicity of robotic lawn care—keeping your garden looking its best with minimal effort on your part.
If you’re looking to simplify your lawn care routine and enjoy year-round convenience, now is the perfect time to explore the advantages of Automower installation in Coleford. Discover how a professional setup from Revill Mowers can elevate your garden maintenance with smart, efficient technology that keeps your lawn looking its best every day.


